After all possible angles and loopholes were covered, the net installation could continue. the port net was first.....unfortunately, I don't have any pictures of the installation without the buoy line installed. I will try to have a couple when I do the starboard side. as I had said in my last build log, I wasn't happy with the rope coils for the tail of the net......it was just to stiff to manipulate the way I wanted it to. I ended up using the large tan thread with much greater success. after a few tries......by hand, without a jig, I might add.....I could not come up with the coil configuration that I wanted....in scale, so I settled on the normal rope coil. this just means that I have a few coils for the Nordkap......no waste!


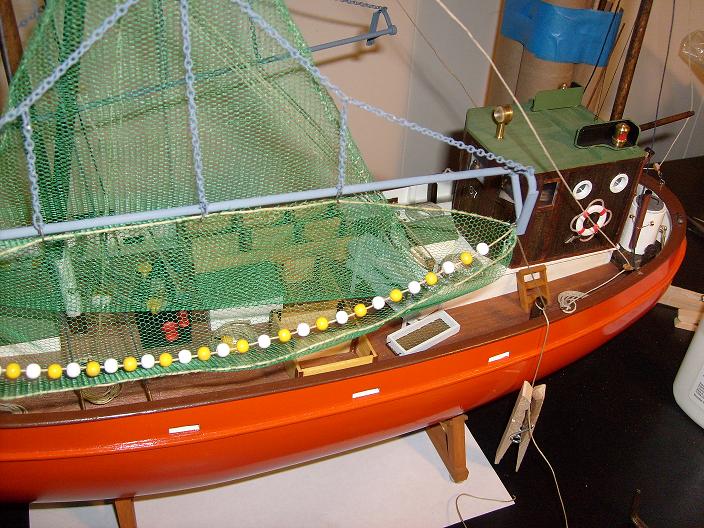
The buoy line was next. there was a funny thing about this.....I started the port side line with a yellow buoy, but you will see white at the start....I ended up with an extra white one towards the end. but that's not the funny part.......there are 32 buoys per side {I thought I had the count right......the um-teen times I counted them}. the port side starts with white....the starboard side starts with yellow....go figure!
In the above picture, I installed eye bolts in the deck for the fore net line. I studied the blue print, but I could not tell where this line ties off. considering that the port fife post was occupied, that ruled them out as a tie-off. the stem post is rather busy as well. time to put the net on.......


The tie-off lines were stowed away at this point.......no lines, no waiting! .....no more pesky clothes pins for me! after attaching the top lip of the net to the back rod of the bar, I adjusted the bottom lip, in order to figure out how to attach the buoy line to it. this is where things took a bad turn. I was going to use the tan thread to attach the line, but after finding that it just wasn't looking right, I decided to take it out and start over.......perhaps with metal instead. when I went to cut the knot with a pair of scissors, I ended up cutting the buoy line itself! when my wife heard what I had done, she cringed, waiting for the profane syllables that were to follow......but they didn't happen. instead, she heard a "no problem"......I came up with a solution that quickly. there was enough of a gap in the buoy hole that I could thread a bit of thread through them and cement the two back together.......ah-kuna-ma-tatta!


Here are the metal connectors that I made. I painted them gray to match the net bars, and noting that the gap between the net and the buoy line will be lesser at each end, I made them at different lengths. the work continued....
The last thing to do on the port side is to install the connectors. both fore and aft lines were stowed away as soon as the knots were dry enough {I cemented the ties}. the rope coil for the starboard side has been cemented into place, to give it time to dry so it can be strung around the belaying pin. the buoy line was assembled during this part of the assembly, so I won't have to do that either. I really don't fore-see any part of the starboard side installation being any different than the port side, so the next build log will be the last, unless I can think of anything else fun to do. until then.......AHOY!


